
Troubleshooting Help
If you're having issues and the troubleshooting suggestions on this page do not work (scroll all the way down), please send a separate email to biztech@samsara.com.
Be sure to include:
That you are an incoming new hire
Your laptop serial number
A description of the issue
Which step you are on
-
A photo of your screen (if possible)
NOTE: Do not CC
biztech@on the original it-onboarding@samsara.com thread, as the IT team will not be able to see the confidential messages this will generate.
🇲🇽 Users in Mexico: Ensure your computer's clock is set to your local time before proceeding with steps below.
For New Hires Onboarding Remotely
These are step-by-step instructions on how to configure your Samsara provided laptops prior to day one. All of the setup steps outlined below are required, as they safeguard your devices and make them compliant. Failure to complete these steps may result in loss in productivity. Please complete as soon as you can before your start date.
Access to email and system applications is not expected until your first day after you've completed IT onboarding sessions, do not try to access apps like Zoom or Slack or Samsara Email prior to your first day. HR will send day one details by end of week to your personal email, please be on the lookout.
Prerequisites
- Samsara provided MacBook and charger
- Access to stable internet / WiFi
If you are a Contractor / Intern
Please remember to keep the packaging / original boxes as they will be used to return your equipment when/if your contract concludes.
How to Set Up your Macbook
Note: An Apple ID is not required on Samsara laptops. Do not enter your personal Apple ID or email; feel free to skip this step if prompted.
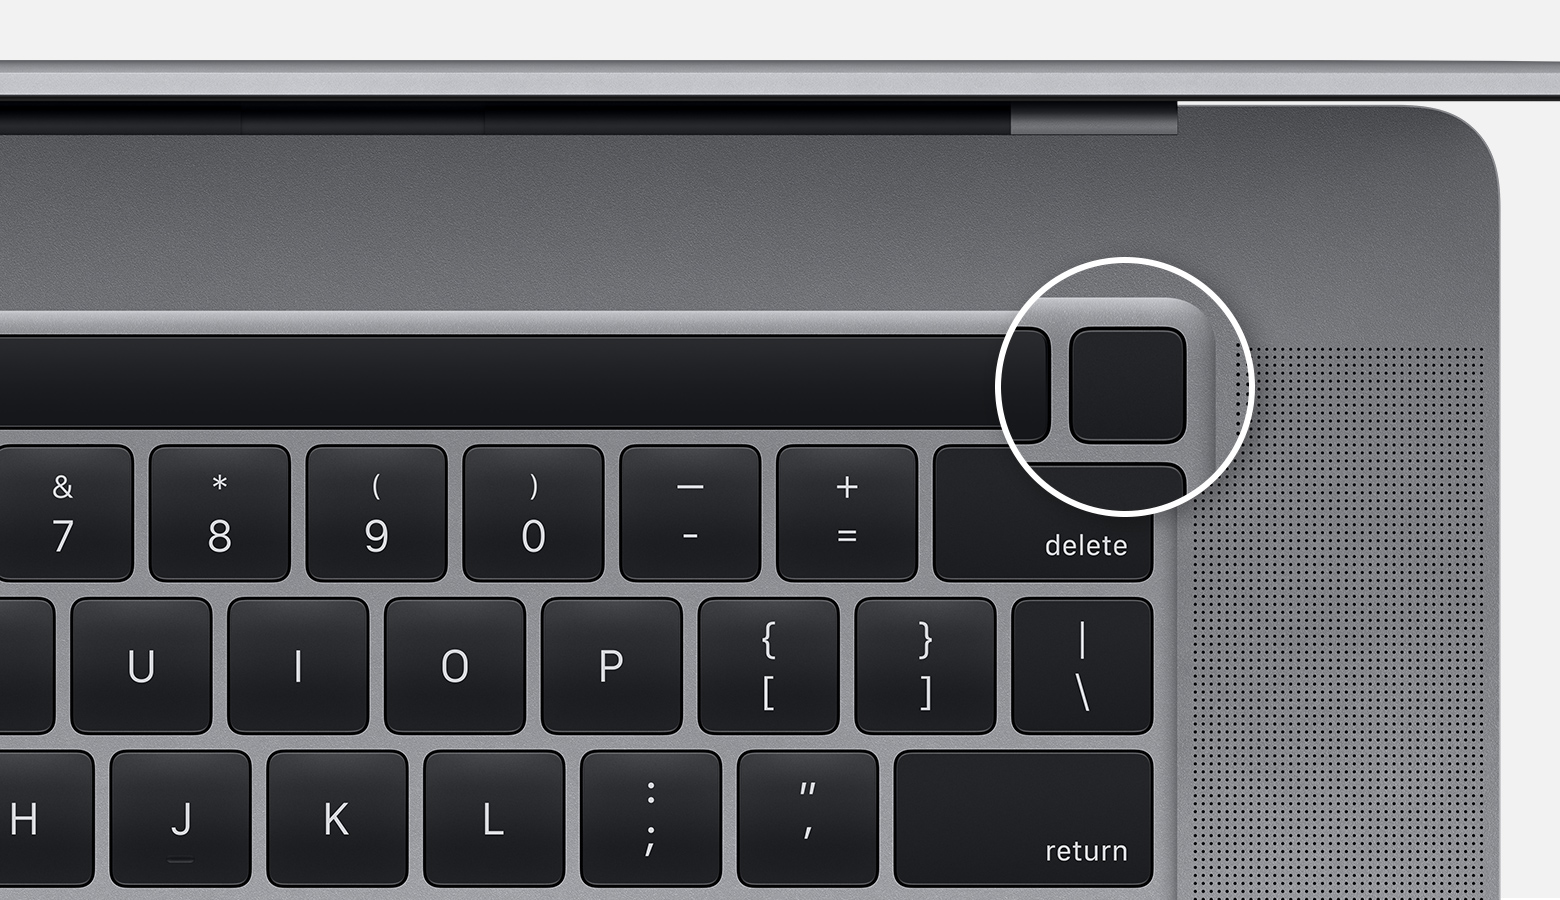
Connect your MacBook to power (this is required for the process). Turn your MacBook on by pressing the power button.
2. Select your Language.
3. Select your Country (this should be the country you are physically working from), and your keyboard layout if requested.
4. When prompted to Transfer Your Data to This Mac, select Set up as new.
Note: Never transfer data from another computer or Time Machine backup to a Samsara laptop. Always choose Set up as new.
5. Select your WiFi network and ensure you are connected. This is required - do not skip this step or the enrollment process will not work!
6. Enter your WiFi password and click Continue.
7. A screen will appear notifying you that Samsara Networks will manage your laptop. Click Continue.
8. In the pop-up window, click Continue and log in with your Samsara email address and password. If you have not already set up your Okta password, please go back to your email with IT and follow the Setting up Okta and enrolling in Incode guide.
9. Next, you'll be prompted to set up a user account for your computer. Follow the on‑screen instructions.

10. When prompted, please enable Location Services on your Mac.
11. Your Mac will then load to the desktop. Within a minute or two, the Welcome app will appear and keep you posted on the progress as your Mac automatically sets itself up. Monitor the screen for any prompts.
Setting up Okta FastPass on your MacBook
During the automated setup, Okta Verify will install on your Mac. You will be guided through the following steps to set up Okta FastPass — this enables passwordless, phishing-resistant sign-in using Touch ID on your Mac. If you already set up TouchID, you can skip to step 17 now.
12. If you did not already, you will be asked to enroll a fingerprint with TouchID, if available on your device, in order to log into Okta without a password. This step is optional but highly recommended for faster and easier logins to Okta. If you wish to use TouchID and didn't set it up yet, click Open System Settings. did not set up TouchID and you do not wish to use it click Skip and go to step 17.
13. System Settings will open to Touch ID & Password. Click Add Fingerprint.
14. You will be asked to enter your Mac password to add a fingerprint. Enter your computer password and click Unlock.
15. Follow the on-screen instructions: place your finger on the Touch ID sensor and lift and rest it repeatedly until the fingerprint is fully captured.
16. Once your fingerprint is enrolled (you will see "Finger 1" in the Touch ID settings). System Settings will close automatically
17. Once Okta Verify is installed, the Welcome app will ask you to click the Okta Verify icon in your menu bar, you'll see a visual guide for where to click
18. The Okta Verify app will open on your Mac showing "Welcome to Okta Verify". Click "Add account from another device" (not "Get started").
Important: This step uses the Okta Verify app on your phone — the one you already enrolled during the Setting up Okta and enrolling in Incode guide. Make sure your phone is nearby with Bluetooth enabled.
Follow the on-screen instructions to complete the cross-device enrollment using your phone. For detailed steps on this process, see the Enrolling Okta FastPass on macOS guide
19. After the cross-device enrollment completes, if you have chosen to use TouchID, Okta Verify on your Mac will show "Enable Touch ID confirmation" with your Samsara email. Click Enable.
20. Once we detect your Fastpass account is set up, the Okta Verify window will close. Your Mac will continue installing remaining apps (Chrome, Slack, Zoom, etc.).
21. If Zscaler asks you to sign in, enter your Samsara email and then use your Okta password or Okta Fastpass to log in
Your Samsara MacBook is now set up and ready to go for your first day!
** Please do not access any other apps in your Okta dashboard until day one of onboarding. Thank you!**
Note: Okta FastPass is device-specific. If you also use a Windows PC or Windows 365 VDI, you will need to set up FastPass separately on each device.
App Access
Access to systems and applications will unlock on your first day of work at Samsara. Until then, your Okta apps will show a lock icon, and access to most tools will be restricted. Your IT Onboarding session on your first day will walk you through how to access your email and other core tools. Once you’ve completed the setup steps in this guide, you’re all set—there are no further action items required from the Biztech team unless you run into issues.
Note: if you are stuck with any of the steps above please reach out to biztech@samsara.com for assistance.
Comments
0 comments
Please sign in to leave a comment.